
OpenOCD Configuration for Ethernut 5
OpenOCD is the preferred tool to access the Ethernut 5 board via JTAG. Unfortunately, at the time of this writing, programming the internal Flash of the AT91SAM9XE CPU is not yet supported by the current OpenOCD version 0.5. Nevertheless, JTAG access is most valuable when dealing with low level hardware problems, not traceable system crashes, and last not least, source code debugging.
This document explains in detail, how to configure OpenOCD for Ethernut 5. While most of you will typically use the ready-to-run configuration files included in the Turtelizer package (also available separately in openocd-0.5.0-configs.zip) and do not care about their internals, it may be sometimes required to go deeper. For example, if things are not working as expected or if you upgraded to any later version which no longer works with existing configuration files. Hopefully, this short guide will help you to solve such unexpected problems.
Configuration Files
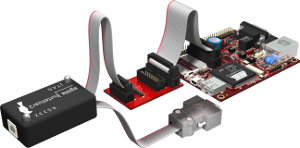
When starting OpenOCD on the command line, at least two configuration files must be provided. One of them specifies the JTAG adapter, while the other specifies the target board. To use OpenOCD with the Turtelizer 2 JTAG dongle connected to an Ethernut 5 board, we can change to the OpenOCD installation directory and enter
openocd -f interface/turtelizer2.cfg -f board/ethernut5.cfg
In most cases we'd prefer to stay in the directory that contains the target's binaries, so we don't need to enter lengthy pathnames to run them from within OpenOCD. We can use the search path option to tell OpenOCD where to find the required configuration files and scripts. Instead of providing the full path to the two configuration files, we can make use of the built-in TCL interpreter to find the and include the two configuration files.
openocd -s /ethernut/nut/tools/turtelizer2 \
 -c "source [find interface/turtelizer2.cfg]" \
 -c "source [find board/ethernut5.cfg]"
You'll probably have to change the search path to point to your OpenOCD installation. Note the backslashes at the end of the first lines. This is a way to tell the Linux or OS X shell, that the command will continue on the next line. I'm using this notation here to make sure that each line will not become wider than the document's total width. You can still copy and paste these lines into your command line window. On Windows, however, you have to enter the whole command in a single line, without any trailing backslashes.
There is nothing special in the Turtelizer 2 configuration file, just a few interface definitions and the USB vendor and product identifiers.
interface turtle
ft2232_device_desc "Turtelizer JTAG/RS232 Adapter"
ft2232_layout turtelizer2
ft2232_vid_pid 0x0403 0xbdc8
While the vendor ID is the one that has been assigned to the chip maker Future Technology Devices, the product ID 0xbdc8 had been granted by this company for use with the Turtelizer 2 device.
The second configuration file, which configures OpenOCD for the Ethernut 5 board, needs to be explained in the following chapters.
Clock Configuration
When powering up Ethernut 5 or when activating the hardware reset, the CPU will start running with the slow clock. This clock is driven by the 32.678 kHz crystal Y2. The theoretical maximum JTAG clock frequency of the ARM926EJ-S CPU is one sixth of the core clock. Due to gate delays and other odds, the practical limit is significantly lower.
While the Ethernut 5 board and OpenOCD both support JTAG adaptive clocking to automatically adjust the JTAG clock to the CPU core clock, the Turtelizer hardware doesn't support it. Thus, we have to specify the JTAG clock in the configuration file. We use the jtag_rclk command, because it will try to use adaptive clocking first and, if not supported, fall back to manual setting. When upgrading to a more advanced JTAG dongle, you won't need to change the configuration.
The following command sets the JTAG clock to 5 kHz, which works quite well with Ethernut 5 running in slow clock mode.
# if RCLK is not supported, decrease JTAG clock rate to 4 kHz
jtag_rclk 5
If you are using long JTAG cables and experience problems with OpenOCD detecting the target CPU, you may gradually reduce this value.
No question, uploading binaries at a bitrate of 5 KHz will be very, very slow. To increase the transfer speed, we can use OpenOCD to switch the CPU to its full speed of 180 MHz and then reconfigure the JTAG clock rate before uploading the binary. The key is the OpenOCD command mww, which enables us to write any value to any available memory address. Here is the complete sequence:
mww 0xfffffc20 0x00004001 ;# CKGR_MOR : enable the main oscillator
sleep 20                  ;# wait 20 ms
mww 0xfffffc30 0x00000001 ;# PMC_MCKR : switch to main oscillator
sleep 10                  ;# wait 10 ms
mww 0xfffffc28 0x2060bf09 ;# CKGR_PLLAR: Set PLLA Register for 198.656 MHz
sleep 20                  ;# wait 20 ms
mww 0xfffffc30 0x00000101 ;# PMC_MCKR : Select prescaler (divide by 2)
sleep 10                  ;# wait 10 ms
mww 0xfffffc30 0x00000102 ;# PMC_MCKR : Clock from PLLA is selected (99.328 MHz)
sleep 10                  ;# wait 10 ms
If you are interested in the details, you will find the PMC register description in the AT91SAM9XE datasheet. As soon as the CPU is running at its full speed, we can increase the JTAG clock rate, using
# if RCLK is not supported, increase JTAG clock rate to 5 MHz
jtag_rclk 5000
This is far less than what the JTAG interface would accept. Well, the maximum clock speed of the Turtelizer 2 is 6 MHz. In practice it turned out, that even that speed will not produce reliable results. So 5 MHz is a good comprise between speed and reliability.
How to add these sequences to the OpenOCD board configuration file? OpenOCD allows to define event handlers in its configuration files. For our purpose two events are interesting: reset-start and reset-init. According to the OpenOCD manual, the reset-start event handler is the best place to switch to the low clock rate. The related event handler definition for the configuration file is
$_TARGETNAME configure -event reset-start {
  # At reset CPU runs at 32.768 kHz. JTAG clock rate must be 6 times
  # slower if RCLK is not supported.
  jtag_rclk 5
}
The handler of the reset-init event is
$_TARGETNAME configure -event reset-init {
  mww 0xfffffc20 0x00004001 ;# CKGR_MOR : enable the main oscillator
  sleep 20                  ;# wait 20 ms
  mww 0xfffffc30 0x00000001 ;# PMC_MCKR : switch to main oscillator
  sleep 10                  ;# wait 10 ms
  mww 0xfffffc28 0x2060bf09 ;# CKGR_PLLAR: Set PLLA Register for 198.656 MHz
  sleep 20                  ;# wait 20 ms
  mww 0xfffffc30 0x00000101 ;# PMC_MCKR : Select prescaler (divide by 2)
  sleep 10                  ;# wait 10 ms
  mww 0xfffffc30 0x00000102 ;# PMC_MCKR : Clock from PLLA is selected (99.328 MHz)
  sleep 10                  ;# wait 10 ms
  # if RCLK is not supported, increase JTAG clock rate to 6 MHz
  jtag_rclk 3000
}
SDRAM Configuration
Beside the fact, that flashing the AT91SAM9XE is not yet supported by OpenOCD, it is always preferred to test applications in RAM. Uploading to Flash memory is slow and wears out the memory cells. The internal SRAM is probably a good place for the very first steps on a virgin machine, but real world applications will hardly fit in 32 kBytes.
SDRAM is the best place for testing your applications. However, after power up or hardware reset, the SDRAM controller must be initialized first, before SDRAM can be used. Like with clock initialization, we can use the mww command to write to SDRAM controller registers. However, in a first step we have to enable the external memory bus and assign chip select 1 to SDRAM.
mww 0xfffff870 0xffff0000 ;# PIO_ASR: Select peripheral function for D15..D31
mww 0xfffff804 0xffff0000 ;# PIO_PDR: Disable PIO function for D15..D31
mww 0xffffef1c 0x00010002 ;# EBI_CSA: Assign EBI CS1 to SDRAM, VDDIOMSEL for 3.3V memory
In a second step we configure the SDRAM controller and initialize the two Micron MT48LC16M16A2 SDRAM chips that we have on Ethernut 5.
mww 0xffffea08 0x85227259 ;# SDRAMC_CR : Configure 2 SDRAMs with 4M x 16 bit x 4 banks
mww 0xffffea00 0x1        ;# SDRAMC_MR : Issue a 'NOP' command
mww 0x20000000 0
mww 0xffffea00 0x2        ;# SDRAMC_MR : Issue an 'All Banks Precharge' command
mww 0x20000000 0
mww 0xffffea00 0x4        ;# SDRAMC_MR : Issue 8 x 'Auto-Refresh' command
mww 0x20000000 0
mww 0xffffea00 0x4
mww 0x20000000 0
mww 0xffffea00 0x4
mww 0x20000000 0
mww 0xffffea00 0x4
mww 0x20000000 0
mww 0xffffea00 0x4
mww 0x20000000 0
mww 0xffffea00 0x4
mww 0x20000000 0
mww 0xffffea00 0x4
mww 0x20000000 0
mww 0xffffea00 0x4
mww 0x20000000 0
mww 0xffffea00 0x3        ;# SDRAMC_MR : Issue a 'Load Mode Register' command
mww 0x20000000 0
mww 0xffffea00 0x0        ;# SDRAMC_MR : Normal mode
mww 0x20000000 0
mww 0xffffea04 0x2b6      ;# SDRAMC_TR : Set refresh timer count to 7us
Further details are provided in the AT91SAM9XE and the MT48LC16M16A2 datasheets.
When adding both steps to the reset-init handler, after the CPU and JTAG clocks had been configured, the SDRAM will be usable after issuing a reset init command. We will later see, how to send commands to OpenOCD.
Optimizing Binary Downloads
Although referring to file transfers to the target board, which is usually called an upload, we stick with the OpenOCD term download.
The AT91SAM9XE CPU provides a DCC channel on its JTAG interface. With its transmit, receive and status registers, this channel is quite similar to a UART and is accessible in a similar way by software running on the CPU. By default, OpenOCD will emulate specific ARM instructions via the debug chain to load data into memory. As an alternative, it may download a short piece of code, which then communicates with OpenOCD via the DCC channel. This is significantly faster than the ordinary way of instruction emulation.
DCC downloads can be enabled by the dcc_downloads command.
arm7_9 dcc_downloads enable ;# Enable faster DCC downloads
In addition, a so called working area must be provided. This area is used to store the small piece of code and as a buffer area used by that code. It is made available to OpenOCD by the work-area configuration. The following line occupies the complete internal SRAM of the CPU as the working area.
$_TARGETNAME configure -work-area-phys 0x00300000 -work-area-size 0x8000
This may fail with specific applications, if they use internal RAM for some routines which are not copied during runtime, but directly loaded into RAM. As it is impossible to predict RAM usage by the application, DCC downloads are disabled by default and commented out in the provided board configuration file. Nevertheless, it makes sense to enable it. Just look at the figures in the table below.
A second possibility to increase download speeds is to enable fast memory access. However, when enabled, OpenOCD may fail to access target memory while the CPU is running at slow clock.
| DCC | Fast Access | Download kB/s |
Verify kB/s |
|---|---|---|---|
| disabled | disabled | 25 | 480 |
| disabled | enabled | 60 | 560 |
| enabled | disabled | 160 | 480 |
| enabled | enabled | 160 | 560 |
All figures had been determined by uploading and verifying the debug version of the Nut/OS HTTP server sample with a pure binary size of 158kB.
CPU-Specific Configurations
There is no target specific configuration available for the AT91SAM9XE. because this CPU is almost identical to the AT91SAM9260, the board configuration file of Ethernut 5 includes the configuration file for that CPU.
source [find target/at91sam9260.cfg]
It mainly specifies a few general things like the JTAG TAP layout, the CPU identifier, the endian type etc. Be aware, that the OpenOCD target configuration files are not always well maintained. In case of problems, it is recommended to check this file as well.
Miscellaneous Configurations
There are just a few things left. Initially the hardware reset pin NRST of the CPU is an output. Driving the reset line on Ethernut 5 low, either by pressing the reset button or via JTAG signal nSRST will not reset the CPU. The following OpenOCD command will active the CPU reset when NRST is driven low for at least 26 clock cycles:
# RSTC_MR: Enable user reset.
# MMU may be enabled, use physical address.
mww phys 0xfffffd08 0xa5000501
If you are experiencing really severe problems with external memories, you can try to build a Nut/OS application for internal SRAM only to further evaluate the problem software-wise. For this, you need to map the SRAM to physical memory address zero.
mww 0xFFFFEF00 0x00000003 ;# MATRIX_MRCR : Remap internal SRAM to address 0
Finally we have to be aware, that the watchdog timer is enabled by default. If not regularly triggered, it will reset the CPU, which is obviously not what we want while testing our application firmware. To disable the watchdog, use:
mww 0xfffffd44 0x00008000 ;# WDT_MR : disable watchdog
Try It Out
An important note in advance: If you have Linux installed on your Ethernut board and if you don't want to risk NAND file system corruption, you should disable the autoboot feature by modifying the bootcmd environment variable in U-Boot. Otherwise your board may be unexpectedly restarted while Linux is booting and you may end up with an unusable root file system. Booting Nut/OS instead of Linux is fine, because Nut/OS applications are not sensitive to unexpected system restarts. To enable Nut/OS booting, enter the following commands in U-Boot.
setenv bootcmd run flashbootnut
saveenv
Make sure to place the right board configuration file in directory board within the OpenOCD installation directory. Set up your hardware and start OpenOCD from the command line, using one of the commands described above, for example:
openocd -s /ethernut/nut/tools/turtelizer2 \
 -c "source [find interface/turtelizer2.cfg]" \
 -c "source [find board/ethernut5.cfg]"
Watch the OpenOCD output for any error messages.
Open a second command line window and establish a TELNET connection to OpenOCD.
telnet localhost 4444
This should give the following response:
Open On-Chip Debugger
>
If the connection fails, try
telnet 127.0.0.1 4444
We can now control OpenOCD by entering simple commands in the TELNET window, one of which is help. It displays a list of all built-in commands.
To trigger our event handlers, enter
reset init
and watch its execution in the OpenOCD window. When done, the Ethernut 5 board should run at full speed and you should be able to upload and run your application binaries in SDRAM.
Instead of using a TELNET connection, you can directly add commands as OpenOCD command line options.
openocd -s /ethernut/nut/tools/turtelizer2 \
 -c "source [find interface/turtelizer2.cfg]" \
 -c "source [find board/ethernut5.cfg]" \
 -c init \
 -c "reset init"
Two notable things here: The init command is used to switch OpenOCD from its initial configuration stage to the run stage. This is required, because the next command reset init is not accepted in the configuration stage. Also note, that commands containing spaces must be enclosed in double quotes.
For further details you may now take a look into the OpenOCD User's Guide.
Finally, you may now want to install Eclipse to try source code debugging.