Installing Nut/OS on Windows
This document describes how to install the Nut/OS development environment on Windows.
Linux/UNIX users should follow this link.
Requirements
You will need
A PC running Windows NT, 2000, 2003 or XP. Other flavors may work as well.
If you want to build Nut/OS for the AVR target, you need to download WinAVR from the related project page at SourceForge. WinAVR is based on the free GNU Compiler Collection for AVR. Here is a
 Shockwave Flash Demo
of the installation.
If you intend to use Nut/OS with ARM targets, we recommend YAGARTO, which is available at our mirror www.yagarto.org or directly from Michael Fischer's www.yagarto.de. YAGARTO is a free collection of tools, including the GNU Compiler Collection for ARM and the Eclipse IDE.
As an alternative to the GNU Compilers mentioned above, you may consider to use the commercially supported Compilers from ImageCraft. However, at the time of this writing, only the AVR compiler had been successfully tested with Nut/OS.
The executable Nut/OS installation package ethernut-x.y.z.exe (x.y.z to be replaced by the current version number). It is available at our download page. Here is a
 Shockwave Flash Demo
of the installation.
The tools listed above will enable you to create Nut/OS libraries and final application binaries. A specific software and optional hardware is needed for uploading these binaries to the target board.
For the AVR platform, an SPI or JTAG Programmer is required. The SP Duo comes with both interfaces, but doesn't provide debugging like the ATJTAGICE from Atmel.
Almost all ARM targets offer support for JTAG Programming. Many of them even come with integrated boot loaders, in which case a standard PC cable (e.g. Ethernet, USB, RS232) is all you need on the hardware side.
Compiler Installation
Nothing special is required for Nut/OS. Simply follow the installation instructions for WinAVR, YAGARTO or ImageCraft.
Nut/OS Installation
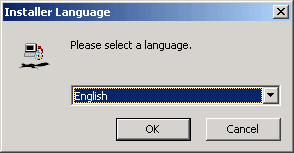
The Nut/OS package for Windows is a self-extracting executable. Starting it, will present a language selection dialog.

Select either English or German. Other languages may be offered, but may not be fully supported. We will use English.
The next dialog shows a welcome page with the Nut/OS version in the lower left corner.

Click Next >.
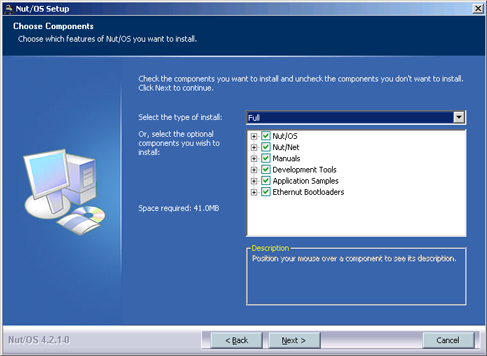
The following dialog can be used to install a subset of the package. Select Full and click Next >.

Select Full if not already selected and click Next >.
Another dialog allows you to choose a destination folder.

Clicking on Install will copy the files to the selected folder.
The following dialog shows the installation progress.

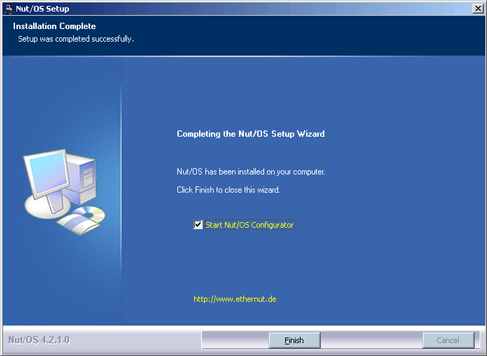
On the last dialog select Start Nut/OS Configurator and click Finish.

If everything went well, the installation terminates and the Nut/OS Configurator is started.
The installation will have created several subdirectories in the destination folder.

nut
Source tree. With the Configurator you will later create sibling
directories called build trees (e.g. nutbld-mega256) and application
trees (e.g. nutapp-ctrl). This way different Nut/OS configurations
for different platforms can be derived from the same source tree and
can be used concurrently.
nut/app
Sample applications,
from simple system event or timer tests to FTP and HTTP servers.
nut/appicc
ImageCraft project templates for the sample applications.
nut/arch
Architecture specific system code, device drivers, linker scripts,
runtime initialization etc.
nut/bin
Application binaries will be copied to this directory with 'make install'.
nut/boot
Ethernut boot loaders.
nut/c
Hardware independant C runtime routines. May be used for platforms without libc, but
not used with the compilers listed above, as they provide their own.
nut/conf
Nut/OS configuration scripts, used by the Configurator.
nut/cpp
C++ support, probably limited.
nut/crt
Hardware dependant C runtime routines, mainly I/O and date/time.
nut/dev
Device drivers, which are configurable for all platforms. These are
just a few. Most drivers are not yet portable and are therefore
located in nut/arch.
nut/doc
API documentation including copyright statements.
nut/fs
Nut/OS file systems.
nut/include
Collection of all C header files, which are related to Nut/OS
source files. You compiler may provide similar, in which case
it is important, that this directory is searched first.
nut/lib
Pre-build Nut/OS libraries. You may try these, if your compiler
somehow fails to create them.
nut/net
Network related code. The TCP/IP stack can be found here.
nut/os
Nut/OS kernel code and some useful APIs, which are not really needed
by the kernel.
nut/pro
High level network code, like DHCP, HTTP etc.
nut/tools
Source code and binaries of various tools. Your PATH environment
should point to nut\tools\win32 in the first place. For example,
make.exe may be also included in your compiler package, but it
may not work with the Nut/OS Makefiles, which sometimes use very
specific features.
A few main tools are not located in the tools directory, but in the application folder.
nutconf.exe
Nut/OS Configurator. GUI tool to setup Nut/OS for your specific
environment.
nutconfigure.exe
Command line version of the Nut/OS Configurator. Useful for
automatic builds and
purists.
nutdisc.exe
This tiny utility is new with Nut/OS release 4.2. It scans
local networks for Nut/OS nodes and allows to configure them
remotely. Provided, that the application activates this service.
What's Next?
You will now be able to build Nut/OS for your specific target hardware and test some of the sample applications. The following links will guide you.
Nut/OS Software Manual (November 2005)
For Ethernut 1 and 2 and other ATmega based boards.
Needs to be updated for Ethernut 3.
Nut/OS on the ATmega2561
Requires the commercial ImageCraft Compiler.
Nut/OS on the Gameboy Advance
Little bit outdated.
Nut/OS on the AT91SAM7X256 EK
Atmel evaluation board.
Nut/OS on the AT91SAM9260 EK
Atmel evaluation board.
YAGARTO Projects
Michael Fischer tried Nut/OS on the LPC2294 and the STR711.
Good luck,
Harald Kipp
Castrop-Rauxel, 18th of October 2006
